Stocktake is the process to manually verify the actual quantity and quality of products in your retail warehouse. It’s an important part of inventory management to make sure you always have the right quantity of items to sell and identify potential inventory issues.
In this article, we’ll walk you through the benefits of stocktake, the stocktaking process, and how to take stock in Magento backend or on a separate PWA using Magestore POS solution.
Benefits of stocktake for Magento retailers
Stocktake helps retailers identify discrepancies between recorded and actual stock levels. With this information, you can identify the reasons behind inconsistencies and resolve any inventory problems before it seriously affects your bottom line. Here are some inventory management problems that you can uncover with stock count:
- Theft
- Damaged goods
- Missing or unprocessed orders
- Misplaced stock
Keeping your inventory system accurate will prevent the following situations:
- Out-of-stock which leads to missed sales and bad customer experience
- Overstock or expired stock which leads to higher inventory cost and lower margins

The stock counting process
The process to count inventory includes 5 steps:
- Warehouse managers plan for inventory check time and location.
- Managers select the product to check inventory.
- You or your staff manually check the quantity and quality of products in the retailer’s warehouse.
- Managers and staff check the discrepancies and identify possible reasons.
- Managers verify the stocktake and adjust the inventory records.
After this retailers can improve their inventory management and stock count process.
How to take stock in Magento backend
Stocktake is a feature that comes with Magestore POS or Retail Management solution. With this feature:
- Managers can create a product list so their staff can check inventory in the retail warehouse.
- Warehouse staff can record the actual quantity of goods in the warehouse as well as the reason for the difference between the recorded and actual numbers.
- Warehouse managers can use the stocktake results to update inventory by adjusting stock in the Magento backend.
In this article, we’ll look at how to take stock in Magento backend. For inventory count solution without accessing Magento backend, check out our article on Magento inventory management PWA.
Before you start
Make sure you have the necessary permissions to create and count stock. Magestore POS gives different roles different abilities.
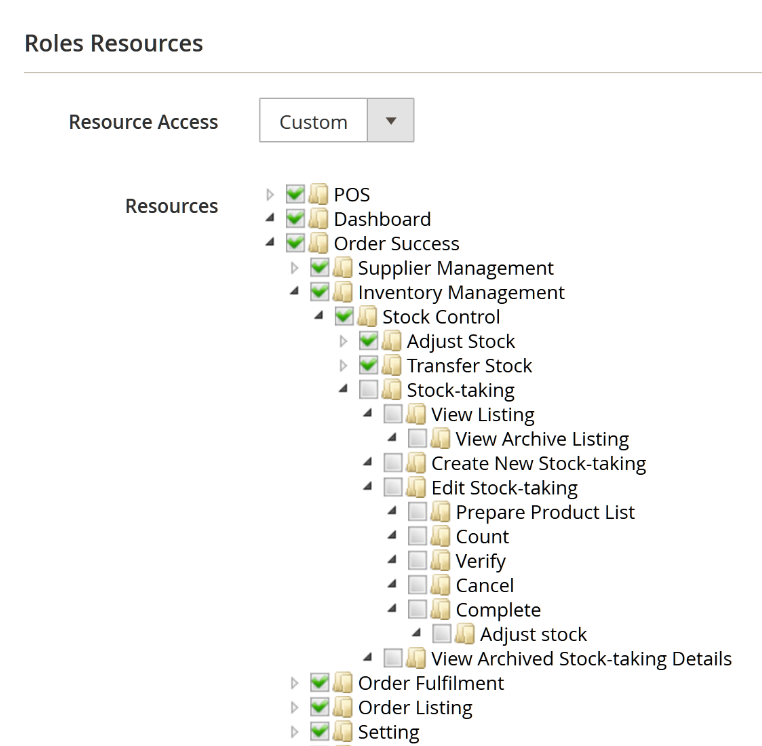
Magestore POS stock-taking permission
With that said, let’s go ahead and open your Magento admin, then head to Stock-taking under Inventory Management.
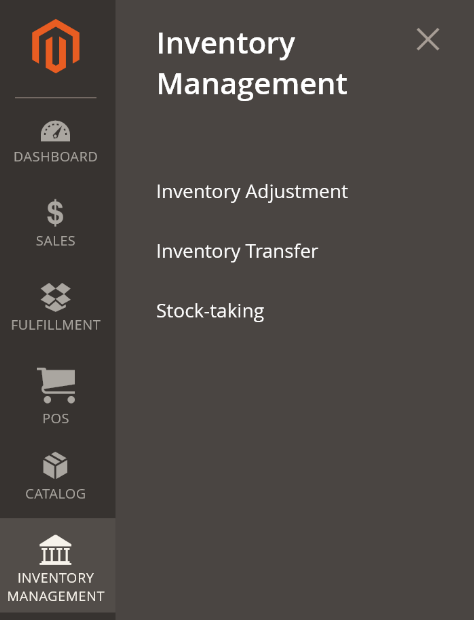
Magestore POS Inventory Management menu
Step 1: Create stocktake
The Stock-taking grid will display all stock counts that are in progress. You can see and filter by:
- The Source you’re performing each stocktake on
- Type of inventory count
- Created date
- Status
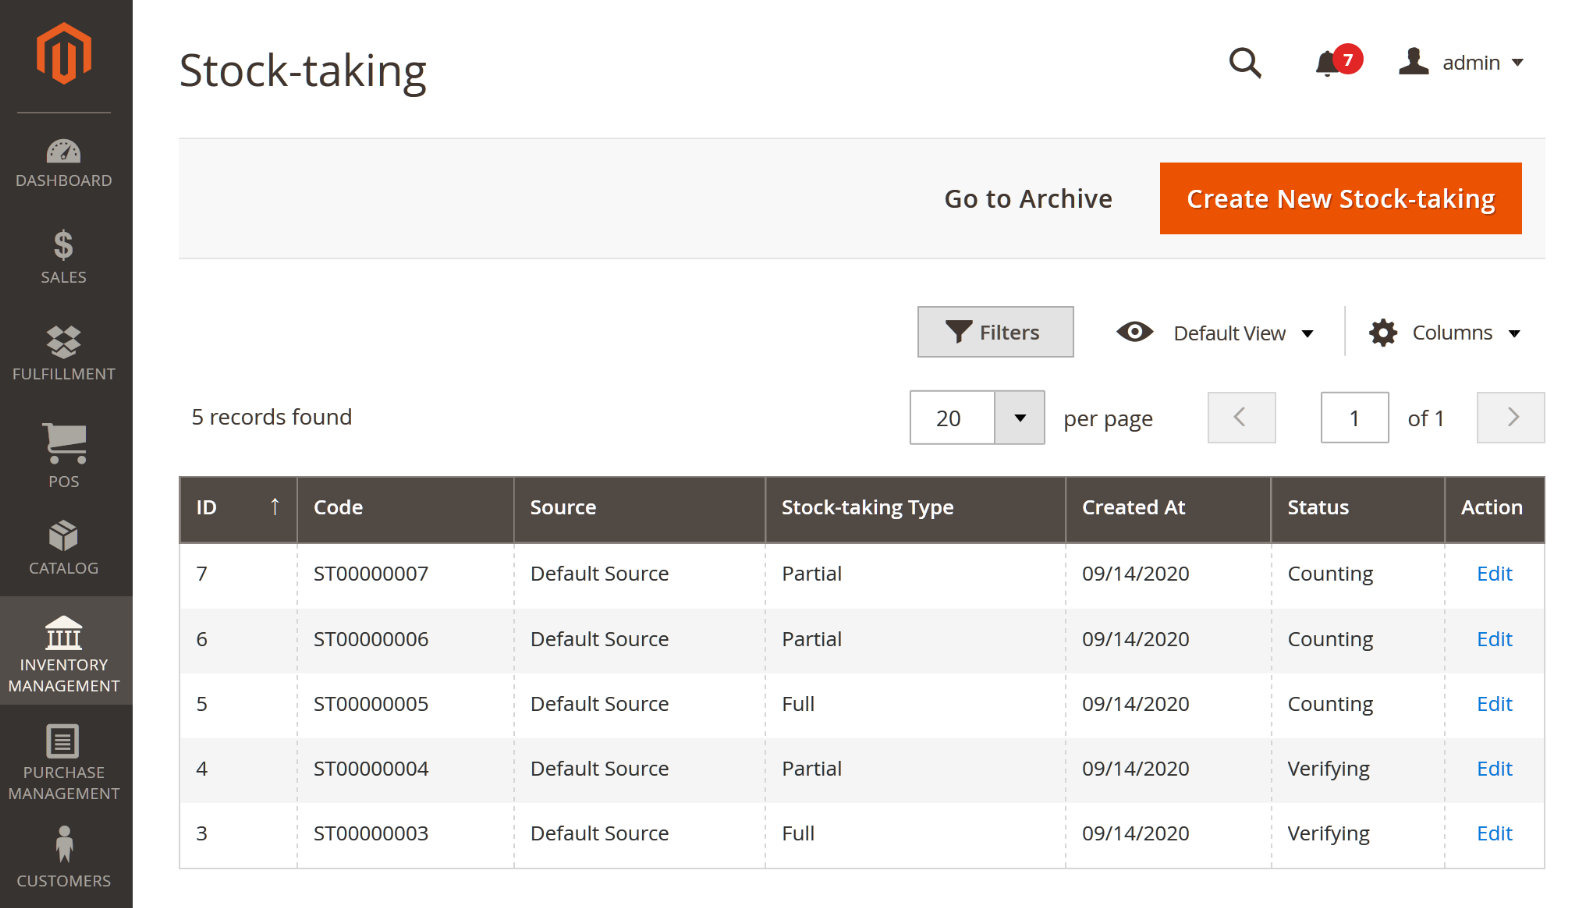
Here you can manage all stocktakes and create a new stocktake.
Press the Create New Stock-taking to get started. We start by filling in the general information:
- Source: select the warehouse to want to check inventory
- Type: With our inventory count feature, you can either do a partial or full count.
- Partial stocktake means you’re just checking the quantity of some items in your warehouse. For example, if you just want to confirm the available quantity for one category.
- Full stocktake is for the situation where warehouse managers want to check the quantity of all items in a warehouse.
- Stock-taking date: Select the date you count inventory
- Assign user: You can assign this stocktake to a warehouse staff who will count the items.
- You can also write more information in the Description field.
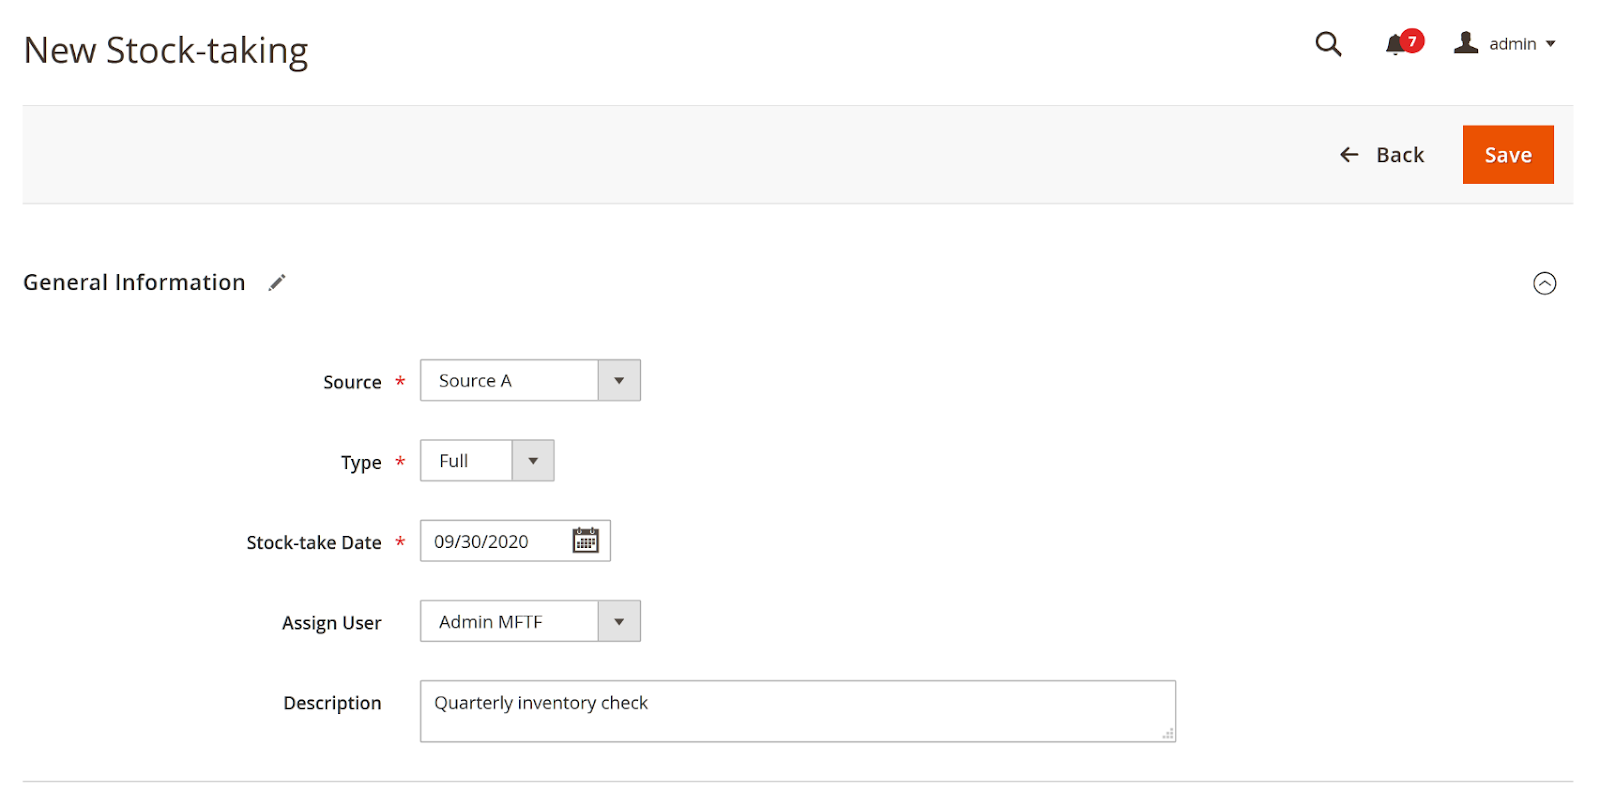
Magestore POS stocktake details
Press Save to create a new stocktake.
You can cancel the inventory check anytime during the Preparing and Counting stage by pressing the Cancel button and confirming your decision.
Depending on your stocktake type, the steps to prepare and count products will be different.
For partial stocktake
Step 2: Select product to take stock
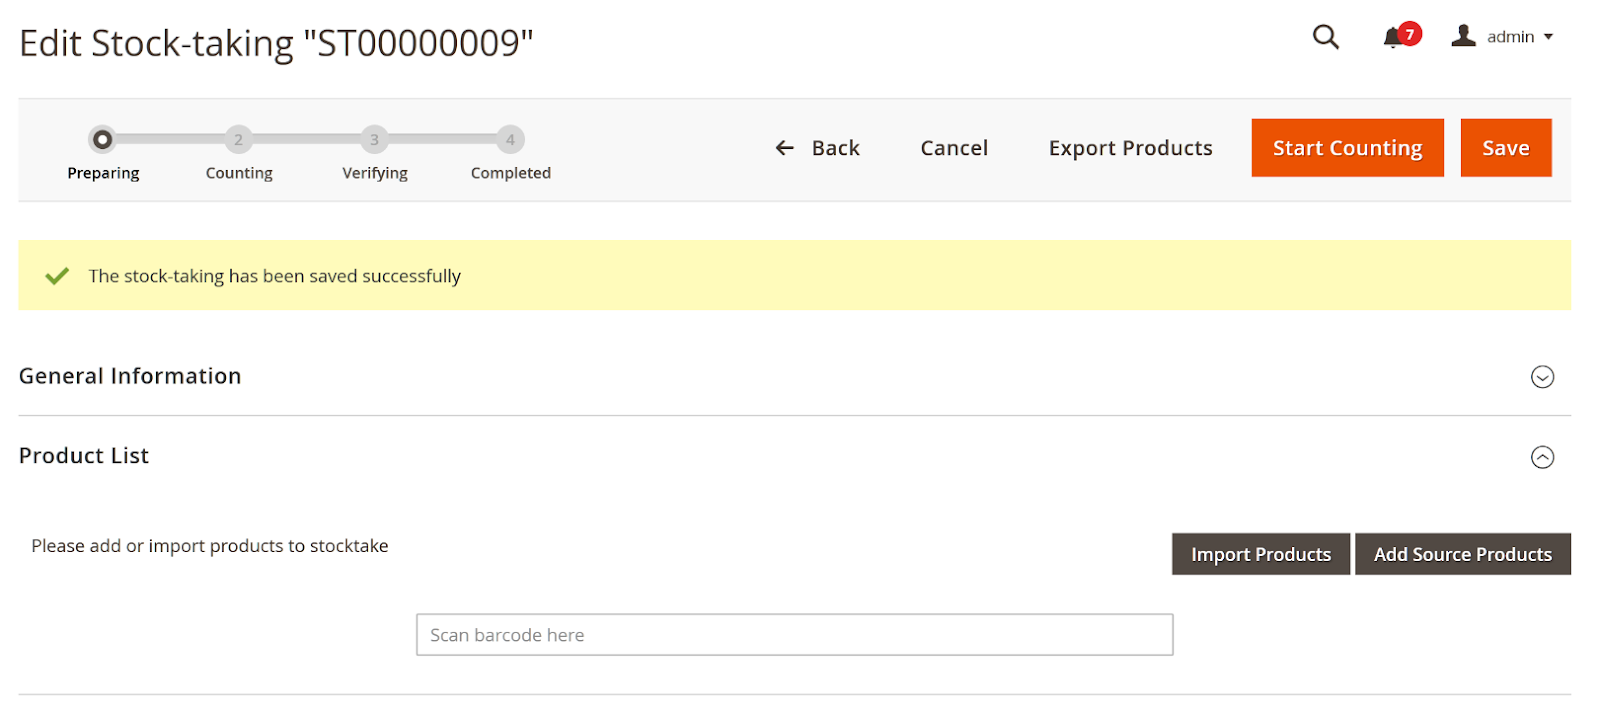
Prepare product for partial stock count
With partial stock count, you can add items to the product list with one of the following methods:
- Press the Add Source Products and select the items you want to check inventory
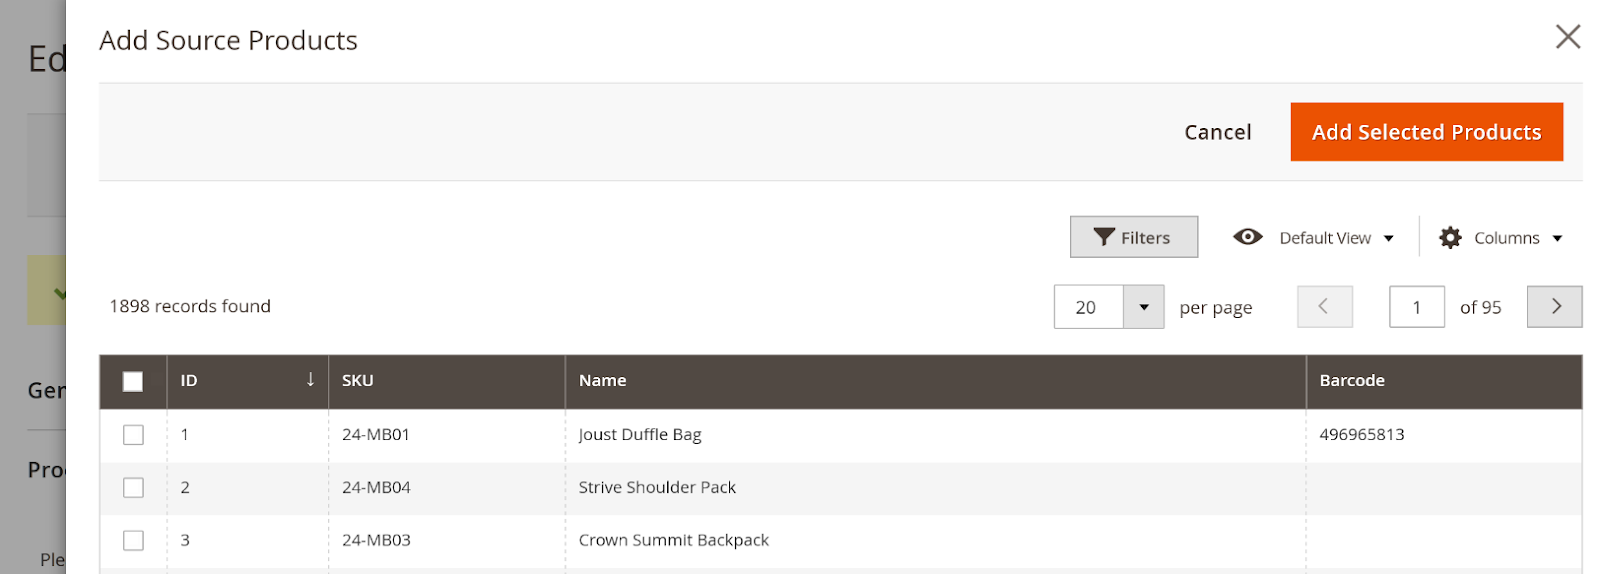
Add source products for partial stocktake
- Scan barcode to add the product into the list (without recording the quantity)

Scan barcode during partial stocktake
- Use a .csv file to import products. You can download the sample .csv file to make sure there’s no issue when you upload your product list.
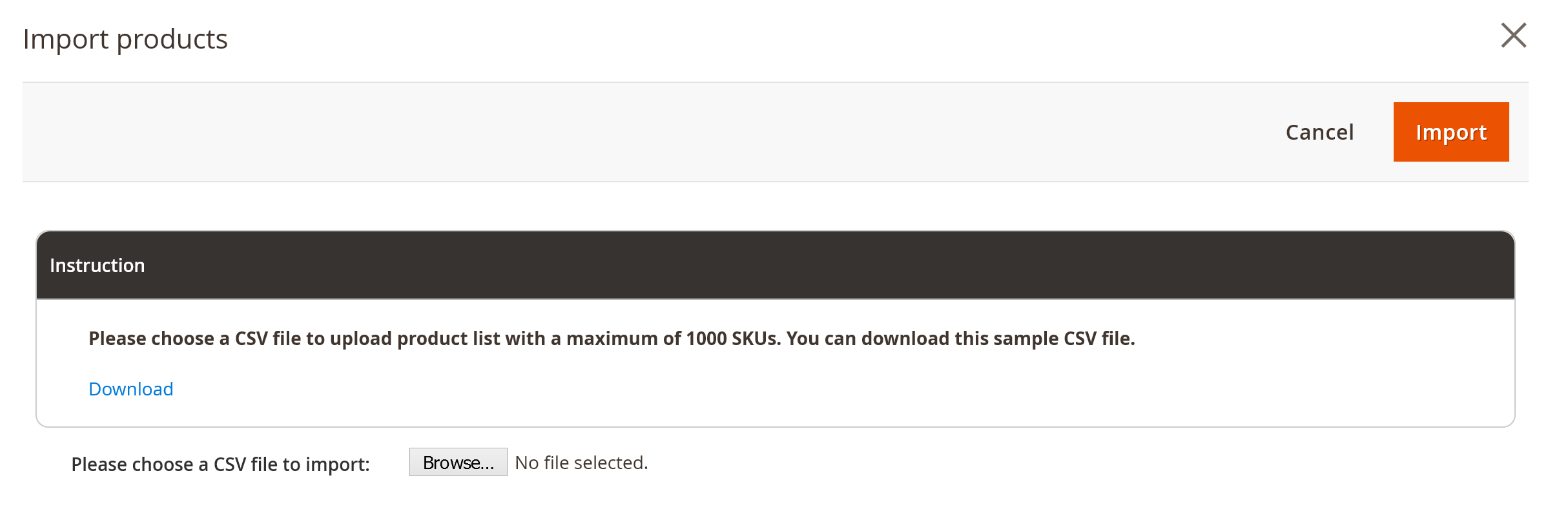
Import .csv file into Magento during partial stocktake
The product list will show you the items to count stock and the current quantity in the selected Source. Don’t forget to save your changes when you’re done selecting the products.
After this, you can export a list of products that your warehouse staff can use to scan and check the quantity.

Print stocktake product list for warehouse staff
Select Start Counting to move to the next step.
Step 3: Count the actual quantity
You can record the counted quantity with 3 options:
- Scan barcode: If you’re doing the stocktake yourself, you can use a barcode scanner to count the product. When you scan the product barcode, the system will increase the quantity by 1.

Stock count by scanning barcode
- Import .csv file: Import a file into your Magento system to update the counted quantity. This is especially useful for cases where your staff uses a separate .csv file to count the products and reports back to you.
- Type in the number: You can also adjust the number by manually typing the number into the field.
During the stock count process, you can write down the reason behind the discrepancy for each product.
Save your counting.
In case you see some differences in quantity and would like your staff to double-check, you can use the Export Difference List to get a .csv file with all the products with discrepancy. Then you can go back and adjust your stocktake results again.

You can export difference list to double-check stock count.
Press Complete Counting to confirm the quantity and move to the next step.
Step 4: Verify and complete stocktake
In this step, managers can check the stocktake information and verify all details.
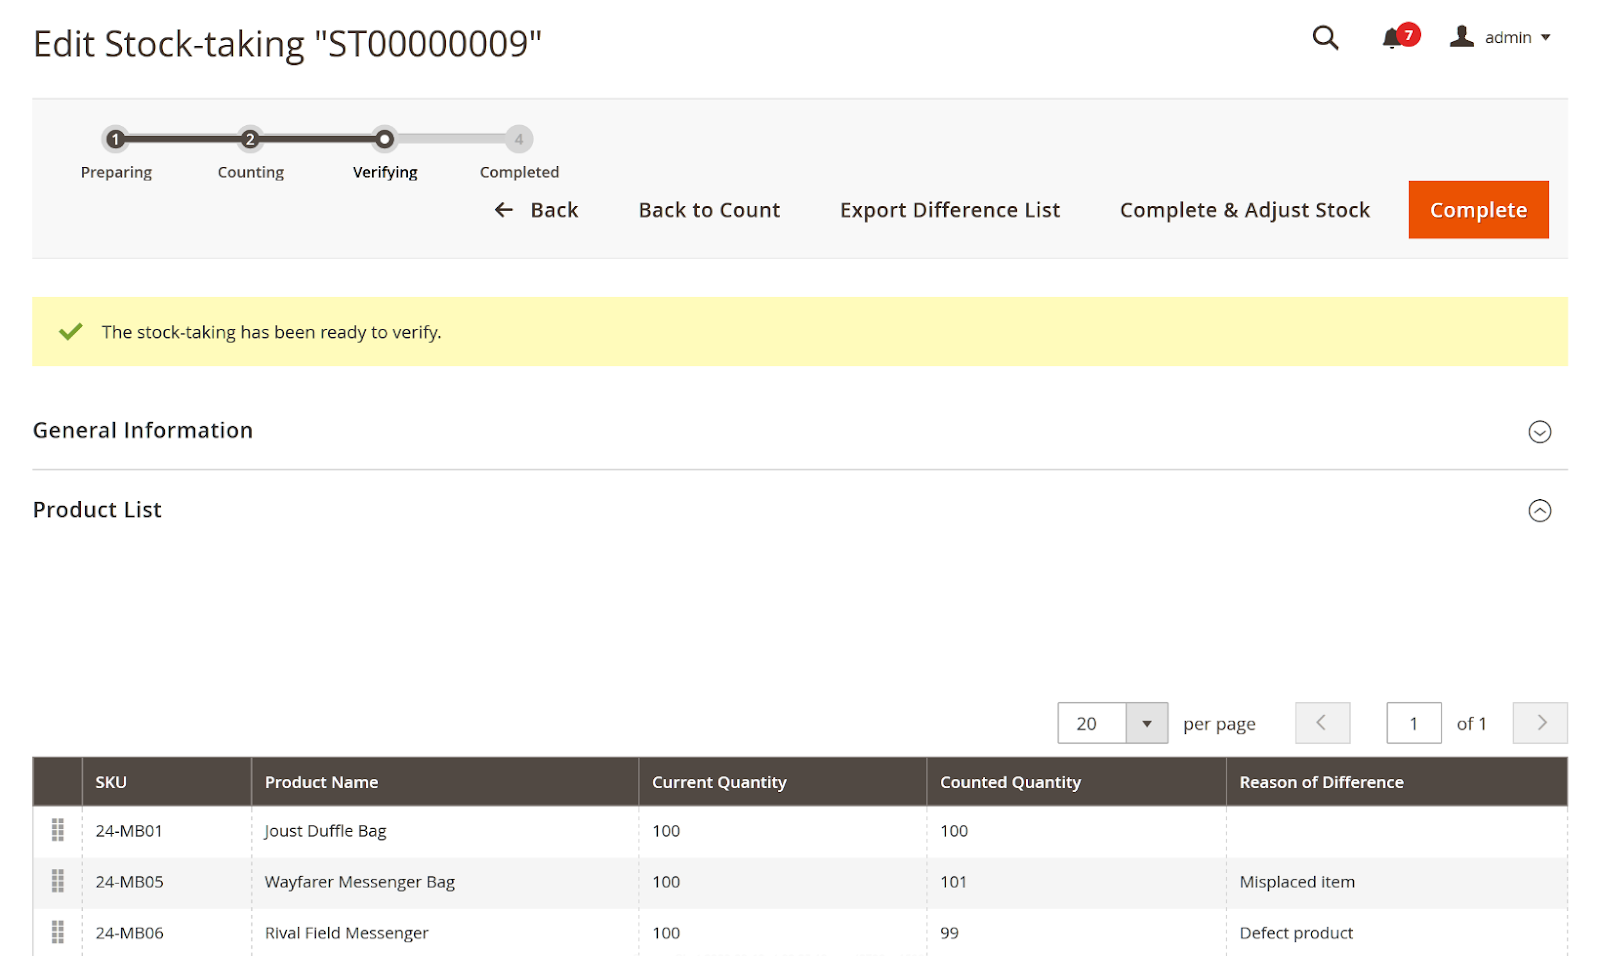
Verify stocktake data
If you see any issues with the stocktake, you can select Back to Count to check the product quantity again.
To complete the inventory check, you can choose one of these options:
- Option 1: Select Complete button
- In case you don’t want to change the recorded quantity in the system yet, you can use the Complete button. This means the stocktake is complete without making any adjustments to the quantity in the Source.
- Option 2: Select Complete & Adjust Stock
- Use this option if you want to adjust the quantity in the Magento Source to reflect the actual quantity in your warehouse.
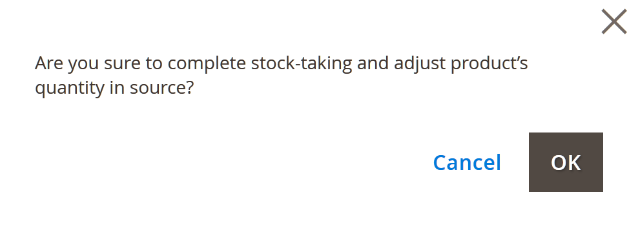
Confirm stocktake and stock adjustment
Confirm that you want to adjust stock for the selected Source. The system will automatically change the quantity in Source to the counted quantity from the stock count results.
With our Inventory Management system, this is done via a completed Stock Adjustment request.
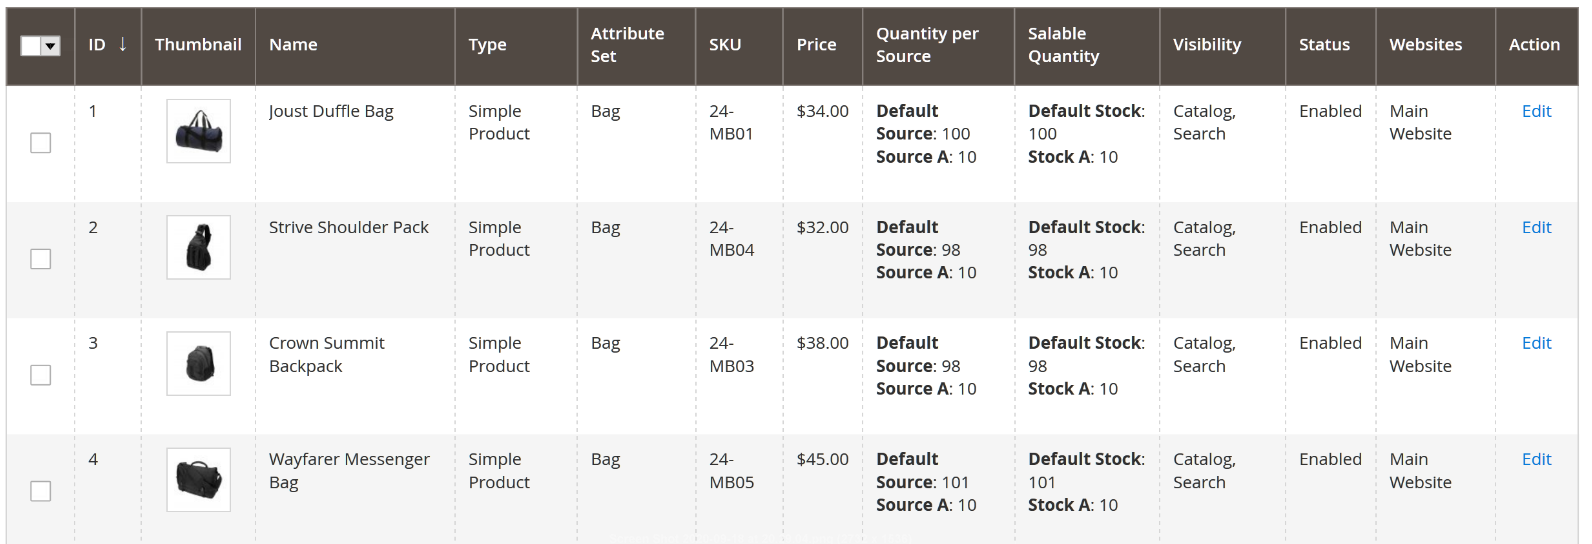
Quantity in source is adjusted automatically.
For full stocktake
While partial and full stocktake activities share some functions, there are key differences in the process and results. We’ll highlight the key differences for you.
Key difference #1 – No preparing stage. Since you’re checking all inventory in the warehouse, the system will skip the steps of selecting products to count and go straight to stock counting.
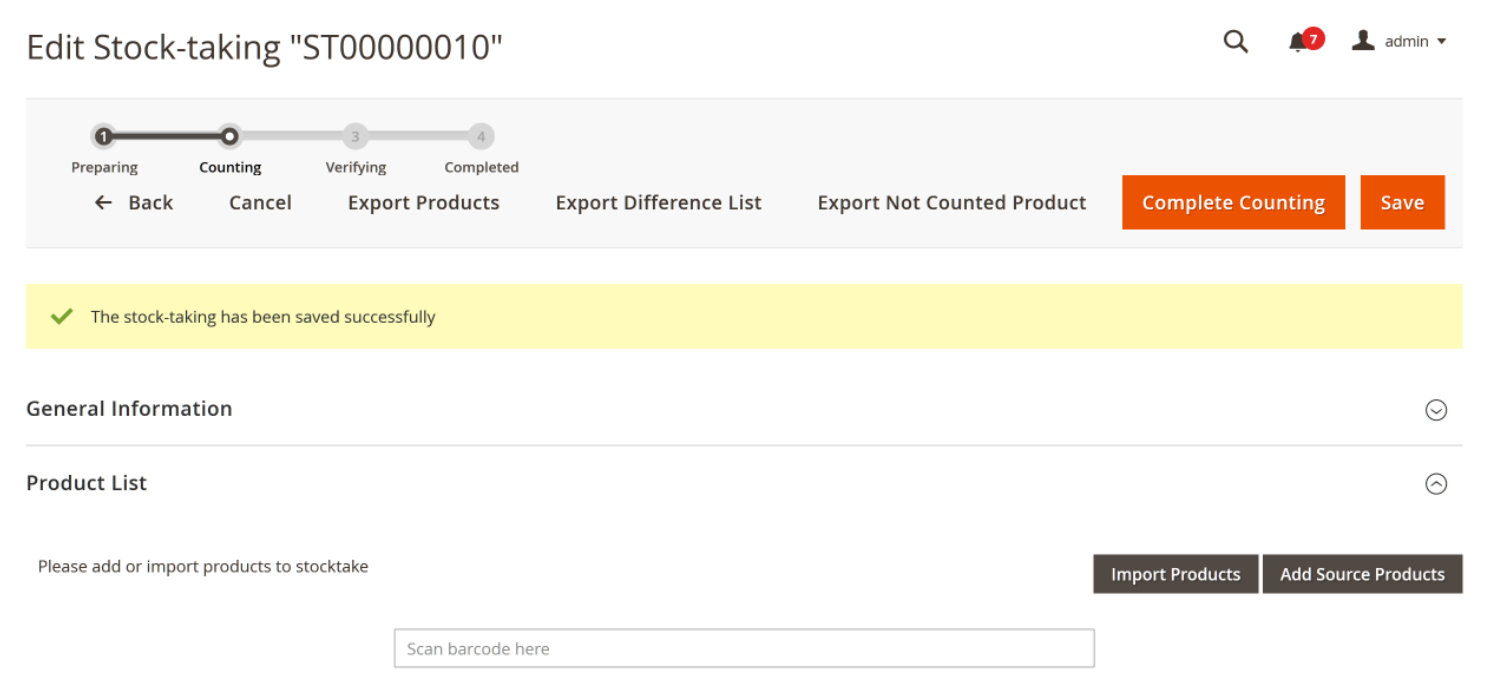
Use full stocktake to count all items in a warehouse
Step 2: Count product
Full stocktake will let you add the products from the selected Source. To adjust the counted quantity, you can:
- Scan barcode
- Import product quantity with .csv file
- Manually type in the counted quantity
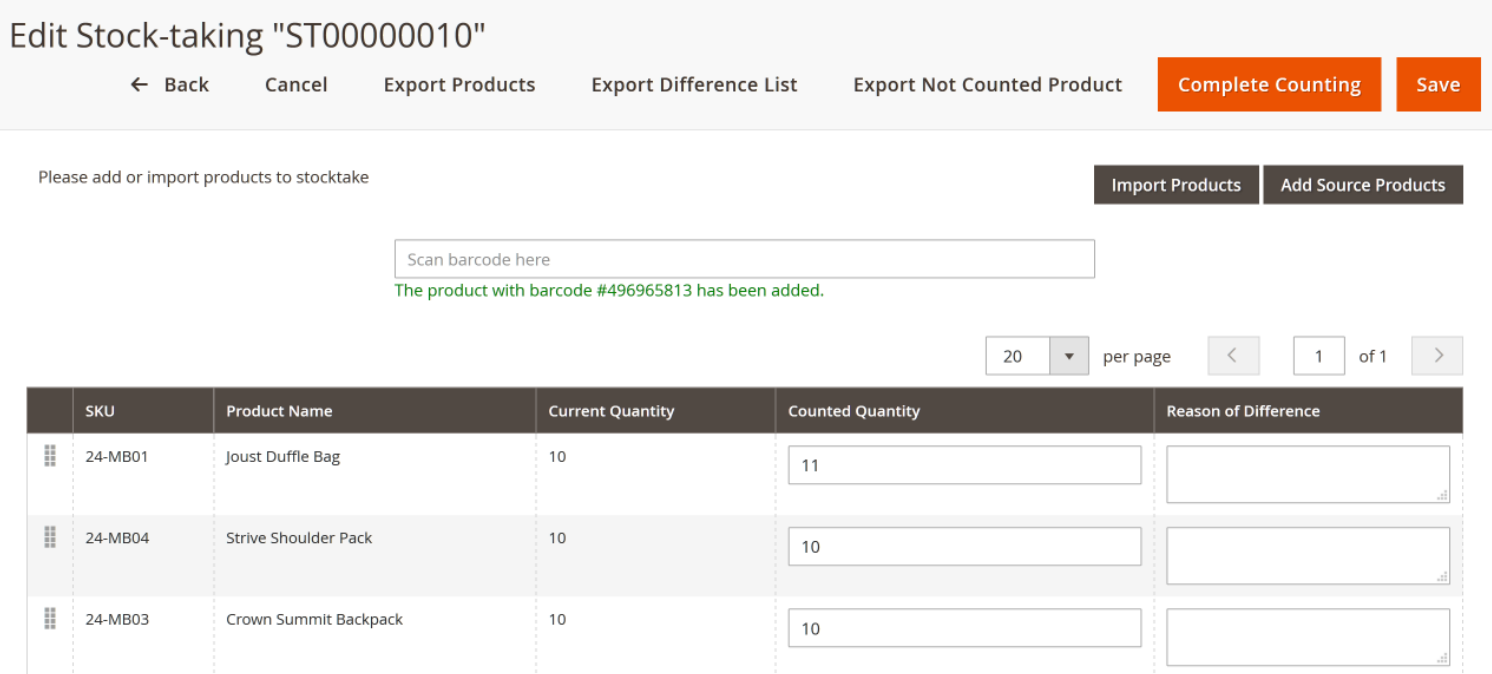
Count items in a full stocktake
Key difference #2 – Option to export not counted products. There may be cases where warehouse managers know there are some items not in the counting list but are in the warehouse. To double-check, select Export Not Counted Product to get a list of items that haven’t been added to the counting list.

You can export a list of not counted products.
Once your stocktake is ready for verification, click Complete Counting to head to the next step.
Step 3: Verify and complete stocktake
Similar to partial stocktake, warehouse managers can review all information on the full inventory check before completing it.
Key difference #3 – Stock adjustment will affect all products in Source, not just the counted items. If warehouse managers select Complete and Adjust Stock in a full stocktake, the system will adjust quantity for all products in the selected Source.
- The number of products included in the count list will be updated based on the counted quantity.
- Products that are in the source but not included in the stocktake list will have their quantity adjusted to 0. This reflects the fact that these products aren’t in the selected warehouse.
View completed or canceled stocktake
On the stocktake listing page, you can select the Go to Archive button.

You can go to archive from the Stock-taking screen.
This grid will display all Completed and Canceled stocktakes.
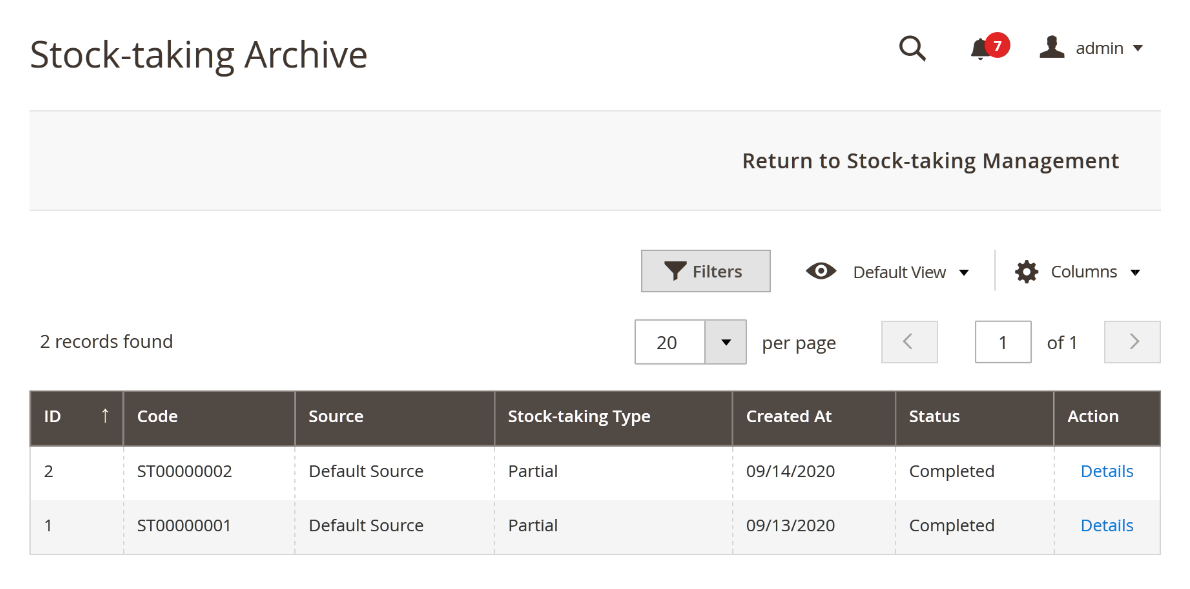
Stock-taking archive in Magento backend
You can view and filter the list by Source, type, time, and more.
Warehouse managers can click on Details to view more information on each stocktake. In the detail page, you can export:
- List of products with quantity differences
- List of all counted products
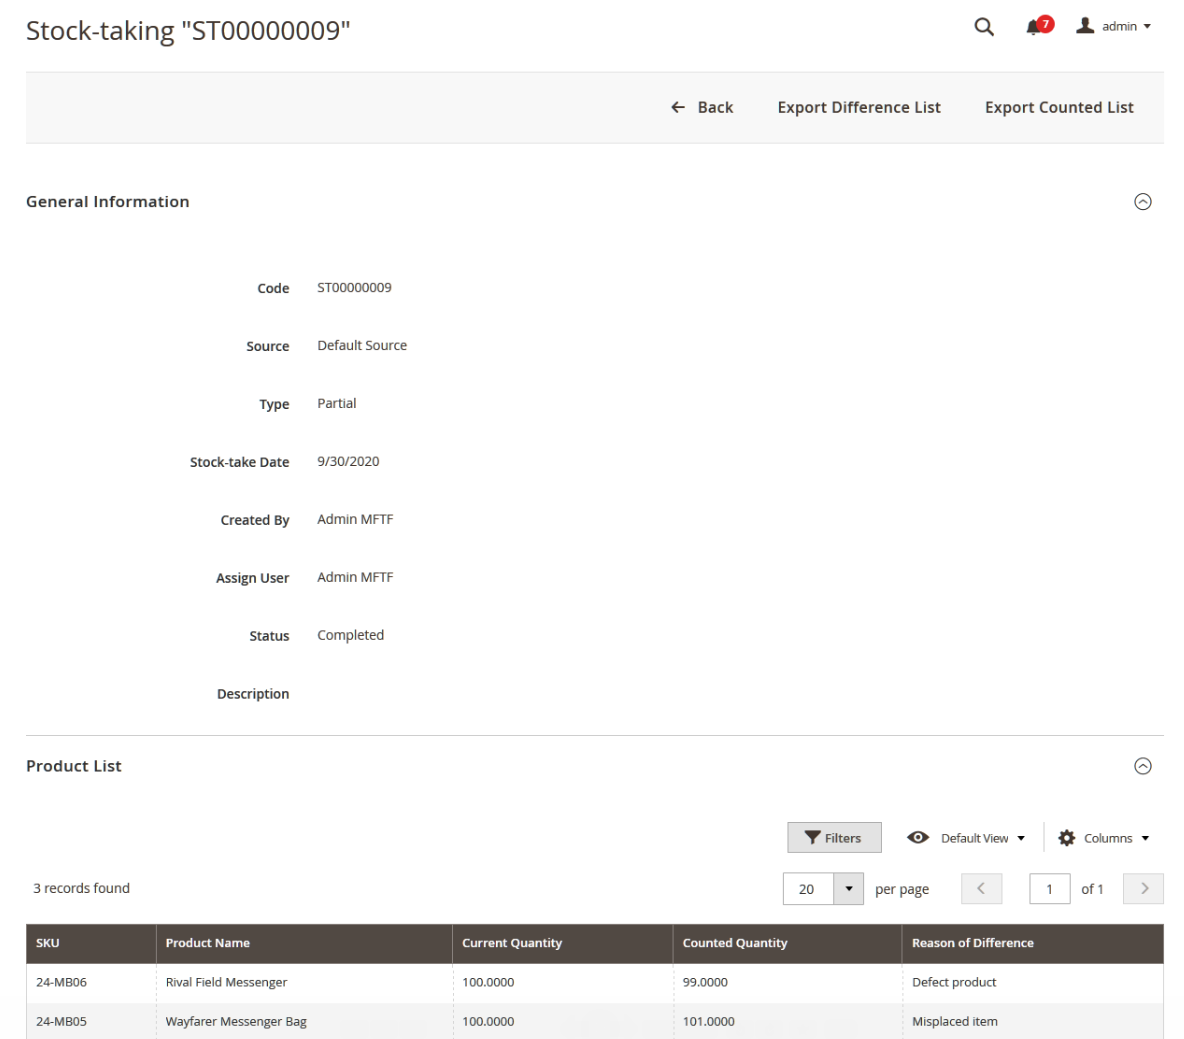
All details of a completed, partial stocktake
You can press Return to Stock-taking Management to go back to the list of all stock taking activities that are in progress.
Summary
Stocktake is an essential feature for retailers to ensure inventory accuracy. With it, you can decide how to move inventory and how much to buy from suppliers.
Magestore solution gives you the ability to:
- Assign permission to different business roles
- Manage in-progress stocktakes
- Create a new stocktake request
- Select product to count stock
- Count stock and record actual quantity into the system
- Verify and complete inventory count
- Adjust inventory based on stock data
- View completed and canceled stocktakes
If you’re looking for this feature, or a complete inventory management solution on Magento, feel free to contact Magestore and get a free consultation.

